My Minimal Street & Travel Photography Setup for 2025
* = for sample footage please view this YouTube video
In my time traveling, camping, and going to different countries, I’ve learned the importance of keeping things light.
Bringing everything you need may seem like the obvious move - until you have to carry it all around.
Logistics when it comes to checked baggage, storage at hostels, and bringing stuff I never end up using has made me realize:
It’s easier to just leave stuff at home.
So, nowadays I make a conscious effort to downsize when I travel, and photography gear is no exception.
The less gear you have, the less decisions you have to make about what gear to use, and the more you can focus on taking photos and enjoying your trip.
Today I’ll be sharing with you my minimal street and travel photography setup for 2025.
It’s the same setup I used when going to Japan and Southeast Asia a few months ago, so it’s been tested.
I’ll also share with you the various bags and accessories I like to use that make traveling more convenient.
Let’s get into it.
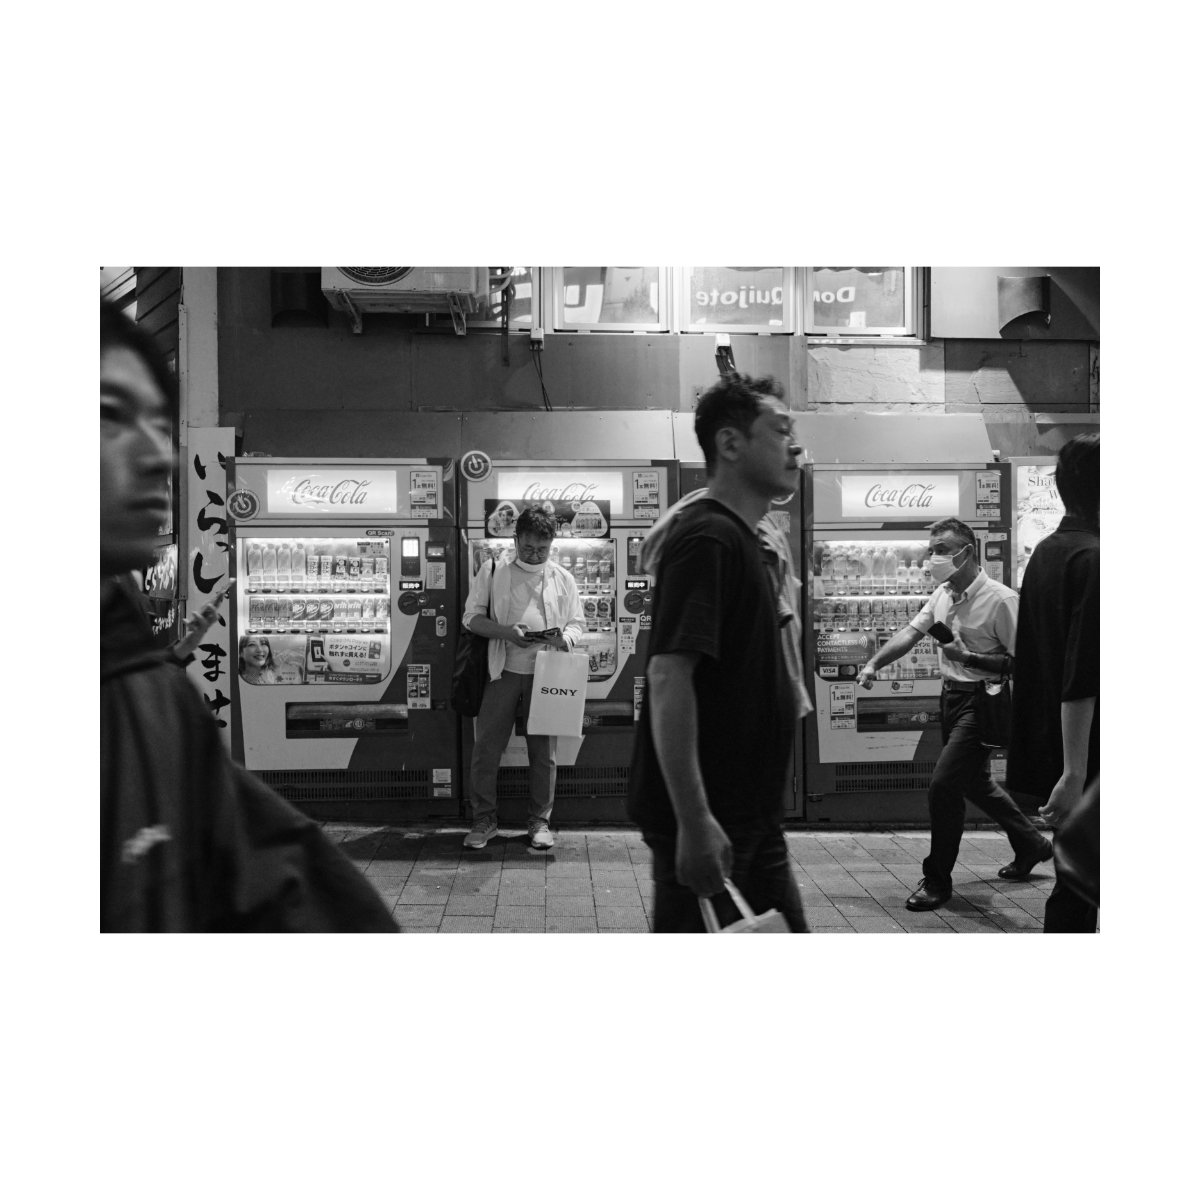
Street Photography
I do two main types of photography: street and travel.
For street, I mainly take pictures of perspectives, cities, lighting, and people.
And for travel, it’s kind of the same but there’s more of a landscape and nature element to it (scenery and views).
There’s honestly a lot of crossover between the two so don’t worry about the labels too much.
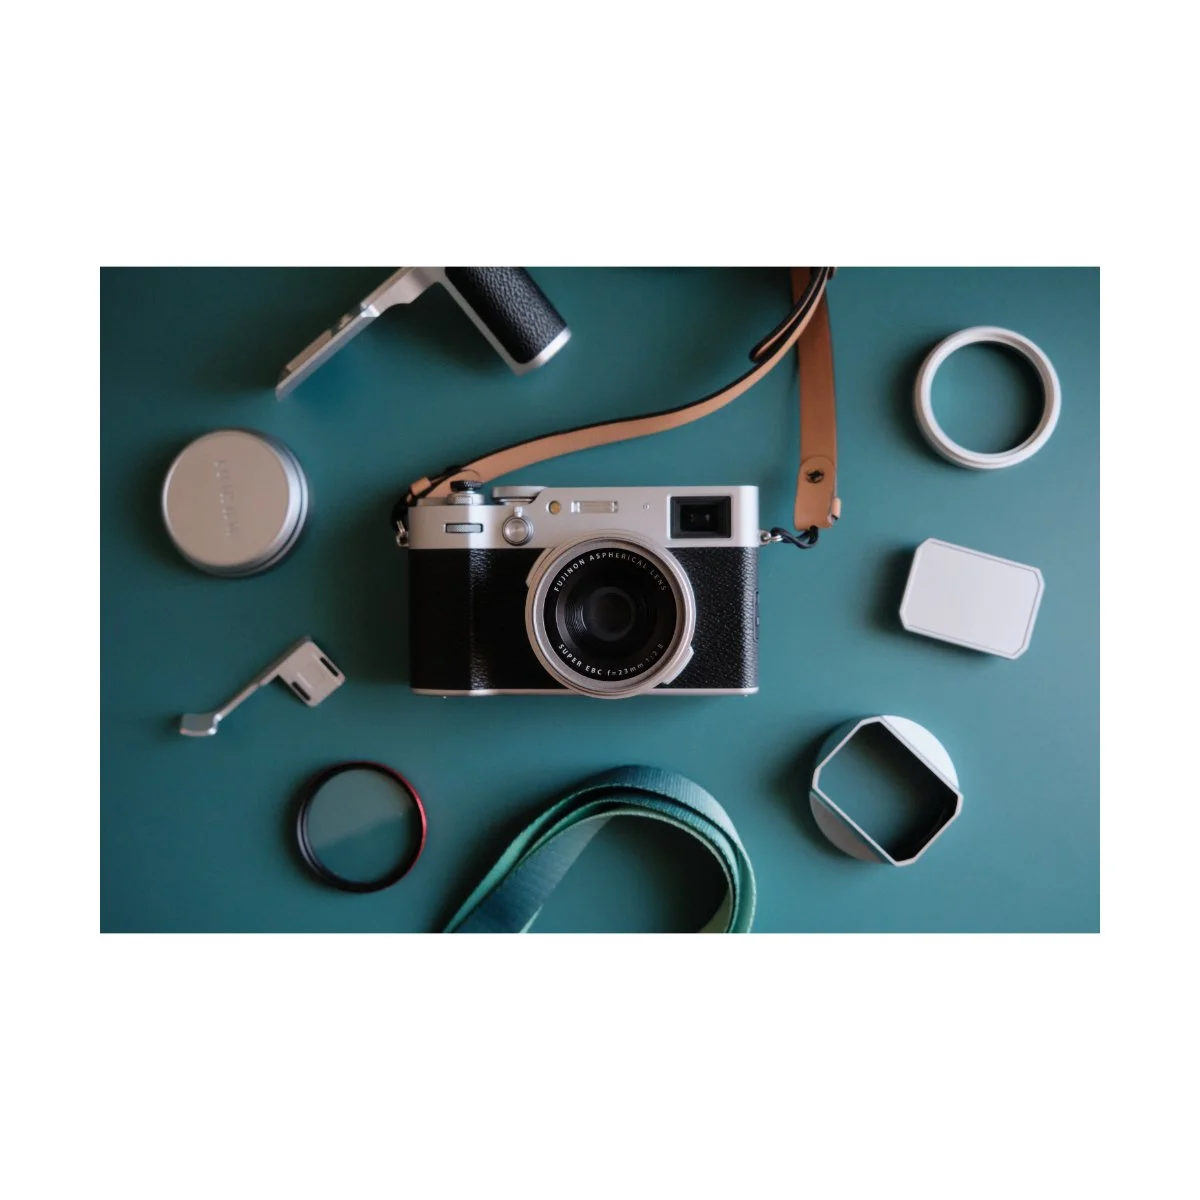
My primary camera for street photography is the Fujifilm x100vi.
Before this, I used the x100v, so an “x100 series camera” fills this niche.

I do still use the V every now and then, so some of these images you’ll see are from the V.
The reason why I like this camera for street photography is because it’s light, portable, and simple to use.
Plus it has the appearance of a normal everyday camera while still getting me the quality of images that I can print and make stuff with.
I can use it for everything from simple perspectives to photographing crowds, to food or coffee shots.

And I can bring it places where I couldn’t normally bring larger cameras.
Because of its appearance, it’s inconspicuous, and less people take notice or are wary of me.
And I’ve found that blending in for street photography is so important.
As a photographer trying to capture candid moments, you don’t want to draw attention.
Sometimes you can’t help it, you’ll stand out regardless, but it’s better to look like a tourist than someone suspicious.
Furthermore, the focal length is great.

The 23mm or 35 eq happens to be my favorite focal length for street photography.
I find it to be wide enough, but not too wide like the 18mm.
And I’ve found that 35mm (50eq) tends to be a bit too close for crowded streets.
It also gives me the right amount of compression that I prefer to blur backgrounds.
And although nailing the compression on this wider field of view can be tough at times, when you get it right it’s very satisfying.

So something like the 23 is the perfect middle ground for me.
So that’s my main street setup.
One body, one lens, at the size I like.
Let’s move on to travel photography.

Travel Photography
For travel photography, I primarily use the Fujifilm X-T4 with the 18-55.
This has been my most solid and minimal setup for years now.
I find it to be the perfect blend between image quality, size, and flexibility.
It’s got all the focal lengths to capture 90% of your photography, without being too big.
Similar lenses like the 16-55 were just too large for my purposes.
Even this setup I find too troublesome to carry around at times, and I’ll only bring it out on day trips to a viewpoint or geospot.
That’s because it’s still heavy when compared to the x100 series, and I’d rather just use that.
So I’ll use the x100vi on a day to day basis and bring this one out when necessary.
In fact, when touring the many scenic spots of Hokkaido, this was the setup I used.

I find it preferrable because it covers the focal lengths the x100vi can’t reach, and sometimes you need something tighter.
For example, if I’m photographing a mountain over here or a sunset over there, there’s no way I’m walking with my 23mm all the way over to get the right composition.
Often times it’s too far and you’ll need a zoom or tighter lens.
Or maybe you’re limited on time and you just need something to capture a variety of images instead of switching lenses here and there.
This setup is better for that, while a single prime I like for street photography.

There are limitations to this setup however: the lack of a tighter or wider focal length.
Because it’s 18-55, you don’t quite have the reach a big telephoto would get you and you don’t quite have the wide angle to get larger perspectives.
But that’s okay.
I’ve found those shots to be more situational, and it’s rare I’d find myself wishing I had a 14mm or 200mm.
If you’re a more serious travel or landscape photographer you’ll probably know if you need that type of lens in the first place.
Me personally, I forsake these end range niche focal lengths for a reliable middle ground where I do most of my photography.

Also note that a X-T3 would’ve been a good alternative if I didn’t need the flip out screen of the X-T4 to record stuff at home.
An honorable alternative to the 18-55 would also be the Sigma 18-50 lens.
I used this for a short period about a year ago and it’s a very good lens.

It has a constant f2.8 aperture, making it better for night and street photography.
Plus it’s just as light and portable, if not more.
The reason why I didn’t upgrade to the Sigma was simple:
I had no reason to.
The 18-55 already does much of what I need it to do.
The main caveat is it’s variable aperture but for most landscape and scenery shots, I’ll be using a higher aperture anyways.
And for night and street photography, I’ll be using the x100vi or V.
The 18-55 also has OIS, making it easier to do handheld video back at home.
So the Sigma lens is a good alternative, but I personally haven’t needed it.
Let’s move on to video.
Video*
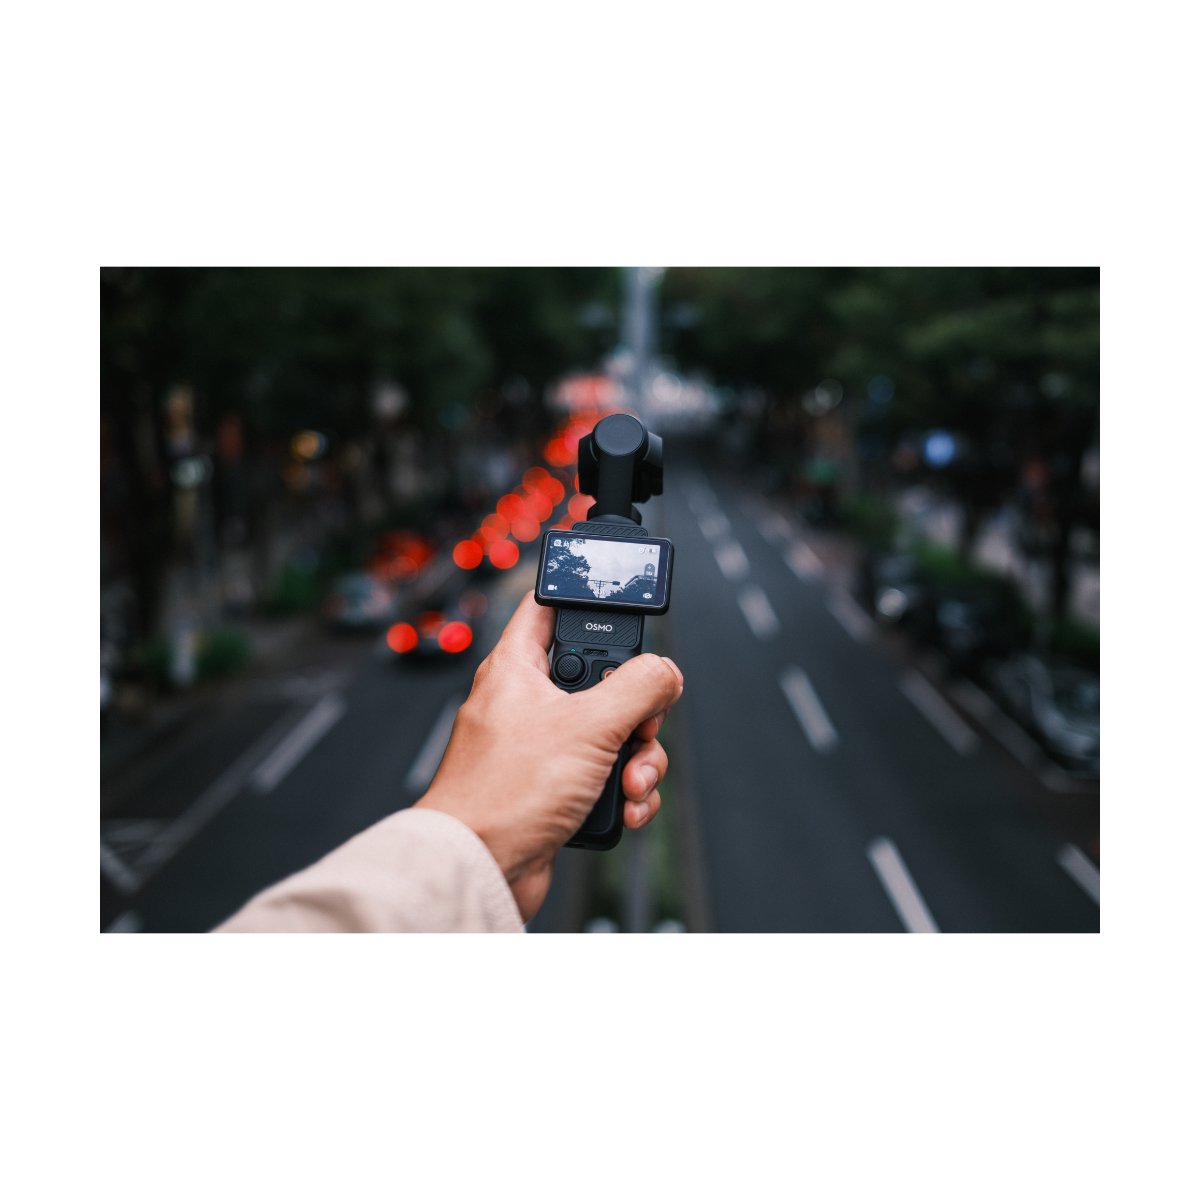
A recent addition to my travel setup is the DJI Osmo Pocket 3.
In my time traveling, I wanted to not only take pictures but also record video.
Videos of the streets I went down, places I went, me doing random stuff, all of which I could use as b-roll for these YouTube videos.
And because I used my other cameras mainly for photography, I found it hard to record video at the same time.
Although both the x100vi and the X-T4 record great video, I didn’t want to keep switching my settings back and forth.
Plus, I didn’t want to go through the effort of setting up a bigger camera just to record myself eating or drinking coffee.
So I needed something small and easy to use.
For these types of clips, the Pocket 3 has been a game changer.
Not only is it tiny, which makes it inconspicuous, but it’s also really easy to use.
Usually it’s as simple as turning the camera on and pressing record.
There are some complications here and there like the focus breathing and angles but nothing I find too bothersome.
Auto settings and the gimbal work well enough so I can just record in one hand and take photos with my other hand.
Understand that I’m not trying to get perfect footage here - usually it’s just run and gun.
I keep most of my attention on the composition of the photos I’m taking, and will occasionally record with the Pocket.
You can take more time and effort to perfect your shots with the Pocket, but that’s less of a priority for me.
The size is really my favorite component of it.
I found it handy when traveling to a variety of places like street markets, crowded walkways, and even inside restaurants.
I can just leave it in one hand and not worry about standing out or feel like I’m doing something weird.
It’s also got good pictures and it’s easy to use for selfies, if you’re into that.
This saves you the trouble of setting up a tripod or asking strangers to take a photo for you.
So that’s the role the Pocket plays in my setup: an easy and reliable way to record video.
Bags*
I’ve got two main bags I use for traveling with cameras.
The first one is the Brevite Rucksack, which I’ve had for many years.
This is the one I bring camping and to different countries.
I like it because it has all the attachments I need:
clips on the bottom for a tripod
camera gear compartment inside with a door on the outside
tablet sleeve, water bottle slot, more pockets, etc
Lately however, I’ve found myself not needing this backpack.
It’s useful to bring out as a main backpack, but it’s kind of heavy for everyday use, and I don’t often need to bring everything with me every day.
Another annoyance I’ve found is that stuff can slip through the top compartment into the bottom one, as there’s no clear divider between the two.
So I use this mainly to house my gear when I travel, but I’ll leave it at the hostel when I go out.
The second bag I have is a recent addition I got specifically for smaller photography day trips.
This is the Topo Designs mini.
I prefer this to the Brevite Rucksack because it’s lighter, more compact, and more minimal.
Because I have less space, I wont bring as much with me, except for the essentials.
This is great for keeping things light and it prevents me from over packing.
It is still quite roomy though.
It has enough space to fit a portable charger, notebooks, tablets, a water bottle, chapstick, sunblock, and your camera if you want.
Just note that the water bottle you’ll have to put inside the bag since the side pockets are too small.
With this bag, I can also fit one camera inside like the x100vi or the X-T4 , while the other one hangs around my neck.
That’s pushing it a bit though…
So this has been my main bag when traveling or going to coffee shops.
I prefer this to a messenger bag because it doesn’t hurt my shoulder.
It’s too much weight for one shoulder, and over time I’ve found myself annoyed to put anything but my keys and wallet inside.
If you plan to travel, I’d recommend to get a smaller backpack that you can use for everyday stuff and just leave the big one at your hotel or at home.
Your back will thank you for it.

Travel Protective Cloth*
A game changer accessory for my travel setup has been this cloth right here - and no, this is not sponsored.
I don’t know what it’s actually called, but it’s one of the better recent investments I’ve made.
When traveling, you want some kind of protection for your camera and lenses.
This is because you’ll be going to plenty of places, moving a lot of things around, and you don’t have time to “slow down”.
Plus, the urgency can make you drop things, throw a bunch of stuff around in your bag, and sometimes scratch and damage your cameras.
So what most people do is they get a camera body or lens case.
These are great but they can also be a pain in the ass.
This is because they’re often too bulky and don’t fit well into most bags.
So they don’t work particularly well for my setup.
So I chose to forsake some protection and opted to get this cloth here.
This is a protective cloth I use to wrap around my cameras and lenses.
That way I can throw my camera into my bag without worrying that it’ll get scratched by my keys or something.
And when I need to put my camera down somewhere, I’ll put this cloth under it.
That way, the camera wont get scratched by the surface of rough tables or rocks if you’re out hiking.
The outer surface is also semi self adhesive so it wraps on itself quite easily.
Plus, the tension is pretty strong - you can lift a decent bit of weight with it.
Furthermore, it’ll conform to the shape of your camera or lens so it’s easier to pack away.
There’s none of this excess space you’d get from these camera cubes.
Now, it’s not a ton of protection.
It wont protect your camera from bumps and bruises if you fall down, but it’ll prevent all the minor little scratches.
And that’s all I personally need, because my camera is around my neck most of the times.
You can also use the inside part of this cloth to clean your gear.
I don’t know if it’s micro fiber or not, but it’s specified as a cleaning cloth, and it works.
It’s also a great towel if you’re going to a wetter country.
When I was in Tokyo, it rained a decent amount and although the VI is weather sealed, it’s not waterproof.

So I’d use this towel to wipe some of the water off and clean the front of the lens so I could still take pictures.
And if you’re like me, and use UV filters, the front is much easier to clean when you’re on the move.
So this in my opinion, is a top tier travel accessory I’d recommend to any photographer because of how little space it takes and how useful it is.
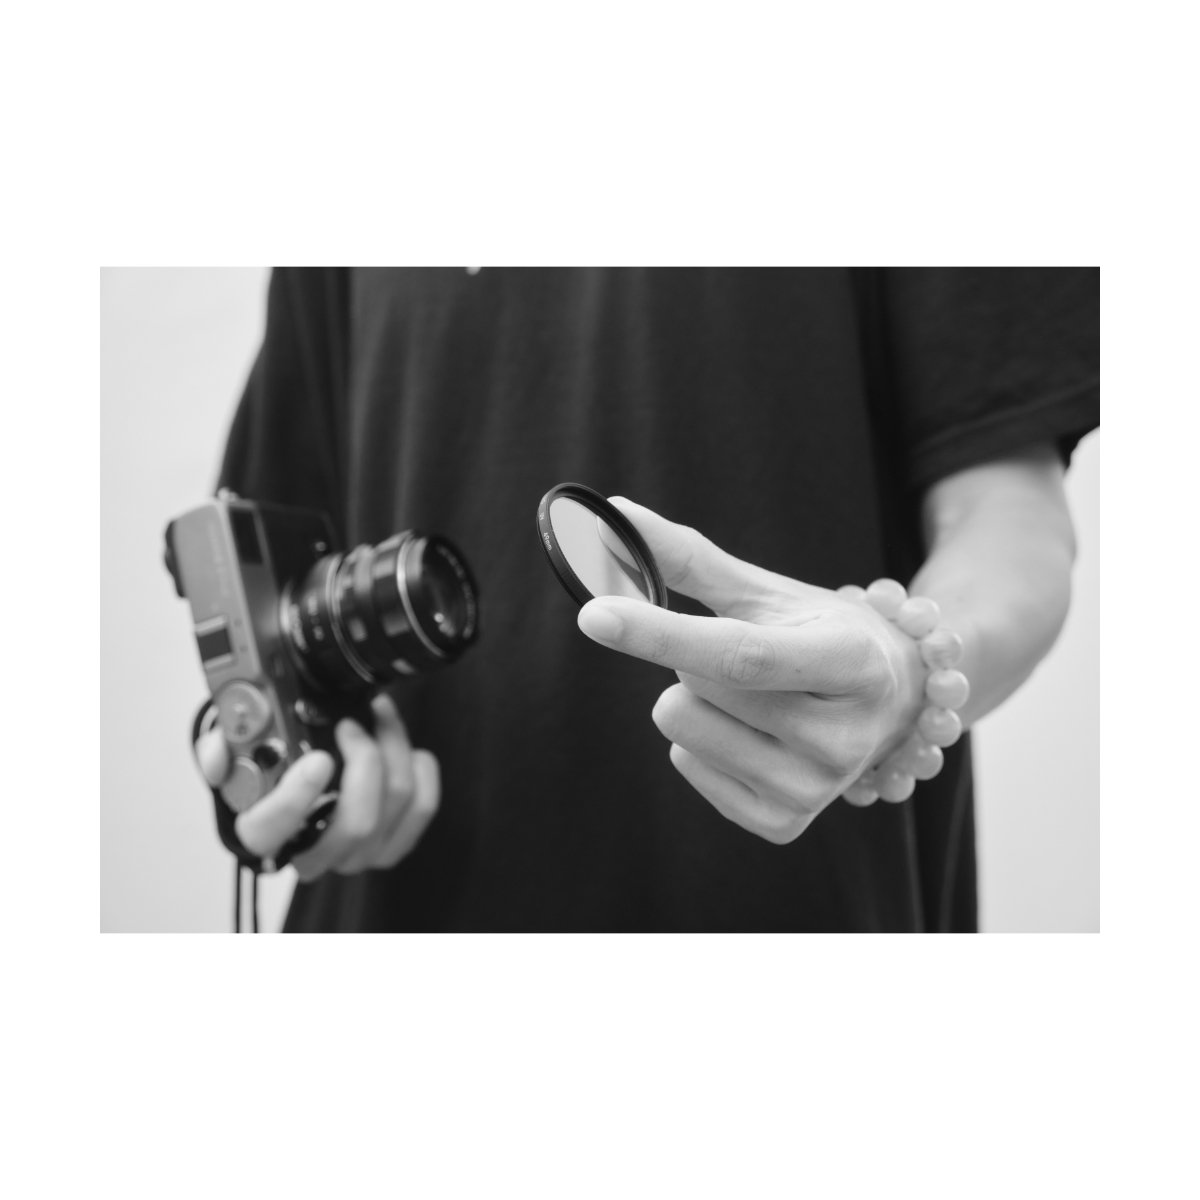
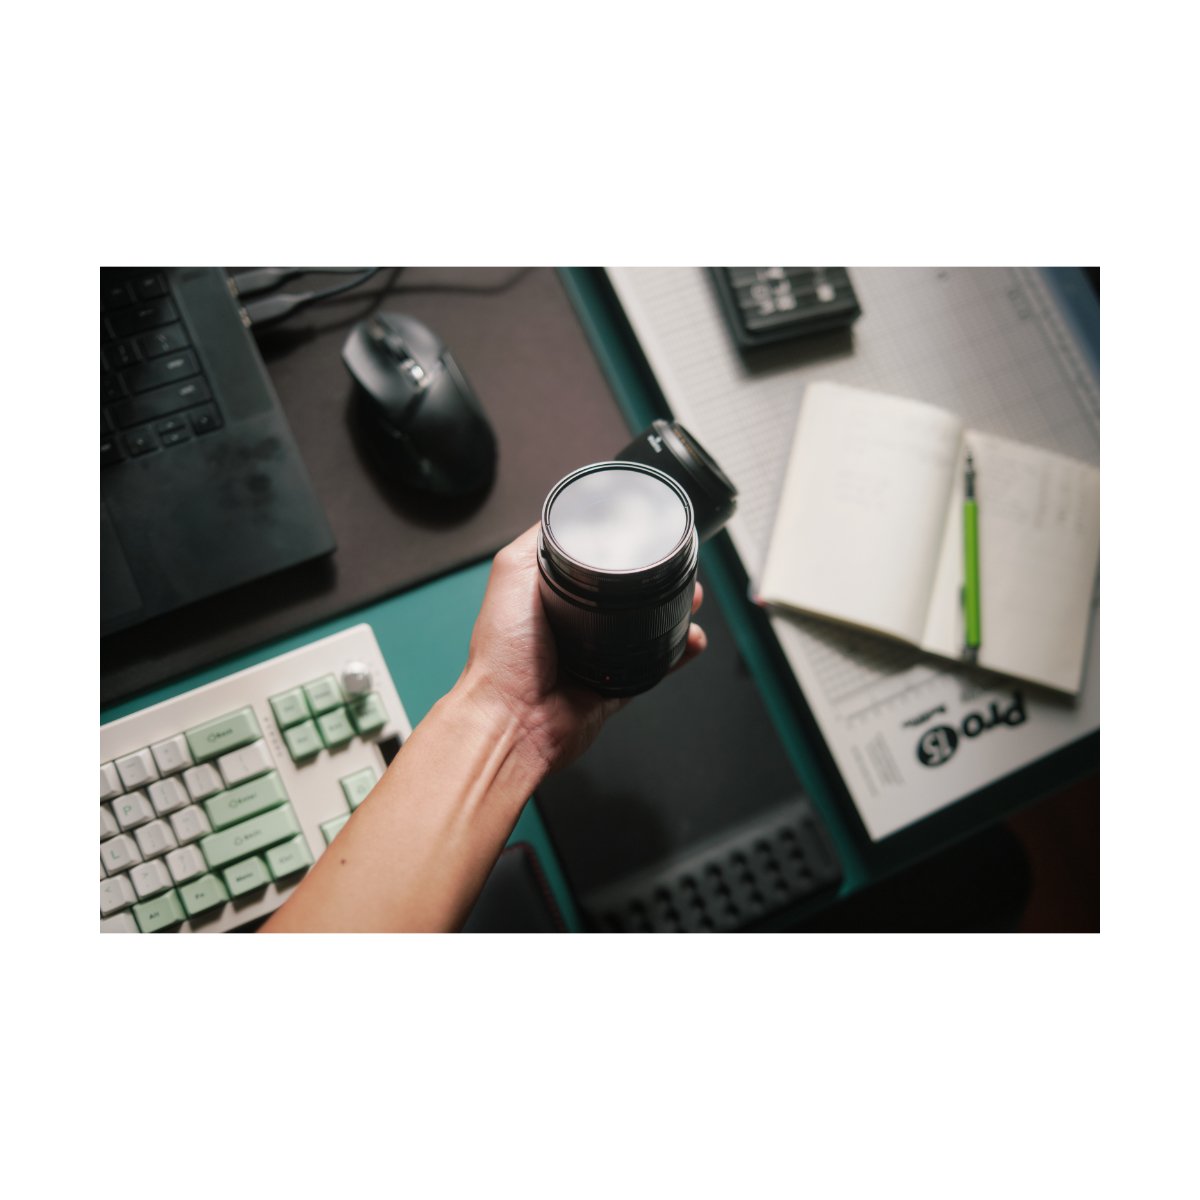
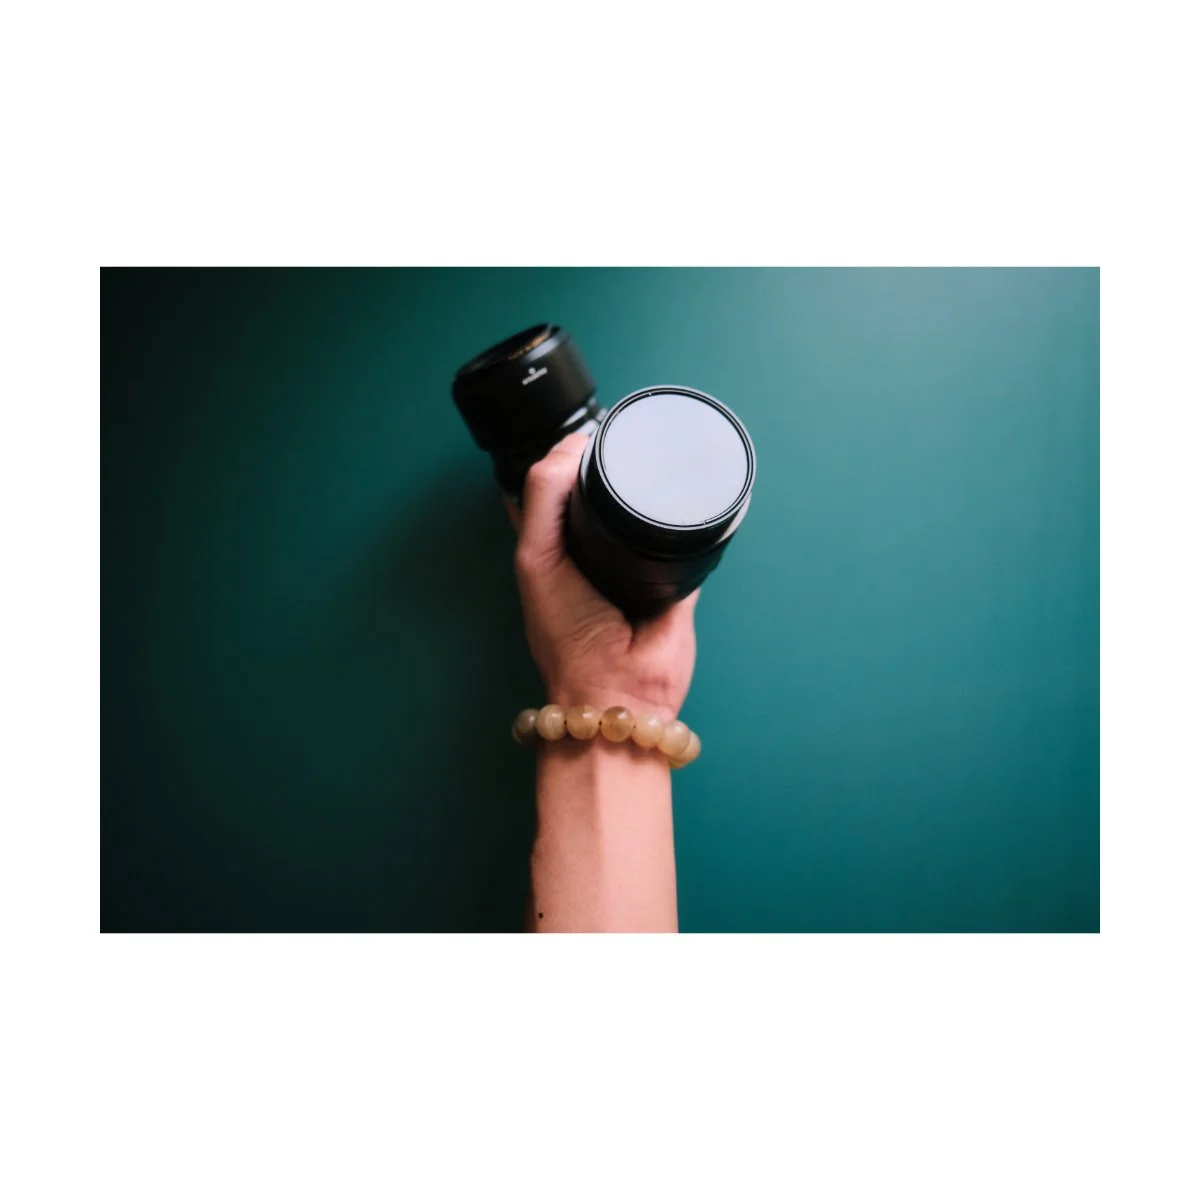
Filters
In terms of filters, I’m not the kind of photographer to use a lot.
The main ones I use are UV or clear filters and I keep them on all my lenses at all times.
For cameras like the x100vi, it’s great, because the camera is weather sealed with it.
And sometimes you’ll find yourself out in the rain, glad you have one on.
But even for lenses like the 18-55, I use as UV filter as well.
This is primarily for protection.
A UV filter helps prevent any scratches or scrapes that come my way.
I’ve found this to be a little bit of money that goes a long way to protect an expensive investment that is your lens.
Many people claim:
You can use a lens hood to prevent bumps, but I’ve found them to be not as effective.
Because it still doesn’t stop stuff coming at the center of your lens.
I’ve had lenses in the past like the 50mm f2 that were saved simply because it had something in front of it.
And a lens hood would not have helped in that case.
So the best part about a UV or clear filter is that if some unforeseen accident happens, you just have to replace the filter, not the entire lens.
Plus, most lens hoods pop out too much for my taste anyways.
I also don’t like to use a lens cap, so having a UV filter on takes care of both things for me.
They’re also much much easier to clean.
Most camera lenses have all these ridges and stuff on the front making it hard to clean when you’re on the go.
But UV filters are just one layer and I can wipe the front and be on my way.
Now the common argument against UV filters is that you’re lowering the quality of your images by putting cheap glass in front of your expensive glass.
But truth be told, I haven’t noticed any significant drop in image quality from using UV filters.
But maybe I’m just not pixel peeping enough.
Besides, if you’re that concerned you can simply get a quality UV filter like B+W and you’ll be fine.
So if I’m being mean, most of the people that complain about the “quality drop” probably don’t go outside much to take photos anyways.
Because plenty of great photographers have taken great photos with crappy gear, image quality be damned.
Anyways, if you want to use a UV or clear filter, it’s up to you.
This is why I prefer to.
CPL Filters
Besides UV filters, there aren’t too many filters I use.
A recent addition to my kit however has been this B+W CPL filter.
I experimented with it in Japan, as it’s supposed to bring out the contrast and whatever in your images.
I also knew I’d be in the car or trains often so I was hoping the CPL could help kill the reflections as I took photos through windows.
It did to an extent, but it wasn’t perfect.
And I did find myself getting a bit annoyed with the filter when taking photos in Sapporo.
I was photographing a famous crystal blue lake in the northern regions of Japan and the CPL filter was giving me problems.
This was mainly because of how polarization works.
I was switching between landscape and portrait shots and had forgotten to rotate my CPL filter at the same time.
So some of my images had a stronger contrast and color, others did not.

So I found that to be annoying, and it wasn’t the CPL filter’s fault, it was mine.
When using CPL filters, remember to adjust your polarization.
Meaning: you have to move the ring in front of the filter to match the correct direction of the light.
Otherwise you’ll have two images that look different in both color and contrast.
If you forget to do this it’ll be hard to fix in post.
So it’s great when you remember, kind of lame it you don’t.
It also means there’s one more thing to keep in mind if you do decide to use it.
Oh well…

Straps
The main cameras straps I use hasn’t changed.
These are the moment leather camera straps.
They’re a reliable camera strap I’ve been using over the years that work for both cameras and phones.
The reason I like them is because they look nice and also feature an easy removal feature.
It’s not quite as streamlined as the Peak Design type clips, but it works and I can switch straps quite easily.
Plus most of my cameras are fairly light so I don’t need the heavy duty stuff anyways.
They’re also interchangeable so I can bring and use one strap for two cameras.
I do typically bring two, just so I can switch cameras without having to switch straps as well.
Now, while I was in Japan I also picked up a phone camera strap.*
I wanted to try something different and see if it worked.
This one just clips to one side of the camera instead of both, and because of this, it’s a tad easier to lift and shoot while I’m on the move.
I have found that the strap stretches a bit, making it easier on the shoulder, but a tad more awkward when hanging.
So a plus here, a minus there, it’s fine.
I’ll use whichever I find comfortable that day.
So a quick overview.
This is my minimal street and travel photography setup for 2025.
For street photography, I use the x100 series cameras.
These are light and easy to bring around, so it’s often just this and my backpack and I’m on my way.
For travel photography I use the X-T4 with the 18-55.
This covers most of my bases without being too bulky.
It’s not as convenient as the VI however, so I’ll leave it at home base if I’m not going somewhere special like Mt. Fuji.
And for video, the DJI Osmo Pocket 3 makes it easy to record stuff while moving around.
As for camera bags, I have two: One is the Brevite Rucksack, two is the Topo Designs mini.
The rucksack I’ll use for bigger days and to get all my stuff over.
The Mini, I’ll use most of the times for every day use.
A recommended accessory is this travel protective cloth.
It does a bunch of stuff and will really make your life easier.
As for filters, I’ll keep a UV or clear filter on at all times, and use a CPL or mist filter occasionally.
And straps, the Moment leather camera straps have served me well over the years.
So that’s my minimal street and travel setup.
I hope you found it useful or interesting - if you did, please share this with a friend.
If you want to learn more about photography, check out Photography Essentials - it’s free.
And if you would like to help support me, you can add to the travel fund on my website or get a copy of “The Sinking Sun”, my latest photography zine.
Thanks for reading, have a great day.